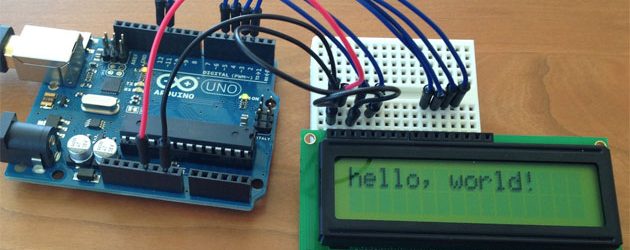
There’s a lot of hidden power and potential in these little devices. And they are a lot of fun to program too. Here is a little project that uses a Ultrasonic sensor ( SR04 ) to change the pitch of a midi note send to a synthesizer. Pots can also be used to change the velocity of the note and the delay. You can get some really interesting effects and some stuff you just cannot produce by using traditional midi controllers.
Arduino midi controller for any midi compliant module, here I use the Korg R3. You can see it in action on youtube.

Code
/*
  midi controller
  TG
*/

#include <Servo.h>

#define trigPin 12
#define echoPin 11
#define ledPin 2
#define servoPin 3

#define MAX_DISTANCE 100
#define MIDI_BAUD_RATE 31250
#define PRINT_BAUD_RATE 9600

#define MC1 0x90
#define MC2 0x91

Servo myservo;

float timeOut = MAX_DISTANCE * 60;
int soundVelocity = 340; // define sound speed=340m/s
int note=50;
int del=2000;
int vel=85;
int changeVoice=99;
String Notes[12]= {"C","C#","D","Eb","E","F","F#","G","Ab","A","Bb","B"};

void setup() {
  pinMode(trigPin,OUTPUT);// set trigPin to output mode
  pinMode(echoPin,INPUT); // set echoPin to input mode
  pinMode(ledPin, OUTPUT);
  myservo.attach(servoPin);
  // Set MIDI baud rate:
  Serial.begin(MIDI_BAUD_RATE);
  note=0;
  myservo.write(map(note, 0, 127, 180, 0));
  changeProg(2); //4
}

void loop() {
  //play a note
  delay(del);
  if(changeVoice != vel)
  {
    //changeProg(vel);
    changeVoice=vel;
  }
  ledControl(HIGH);
  //Build up a basic chord from root note
  noteOn(MC1, note, vel);
  //noteOn(0x90, note, 0x00);
  delay(del/4);
  //Add a fifth ( 7 semitones)
  noteOn(MC2, note+7, vel);
  delay(del/4);
  //Add a third ( 3 semitones for minor , 4 major)
  noteOn(MC2, note+3, vel);
  delay(del);
  //turn off
  ledControl(LOW);
  noteOn(MC1, note, 0x00);
  noteOn(MC2, note+7, 0x00);
  noteOn(MC2, note+3, 0x00);

  float gs=getSonar();
  del = analogRead(A0);
  vel = map(analogRead(A1), 0, 1023, 127, 0);

  //base note playing is determined by the ultrasonic sensor
  if(gs>0.1)
  {
  note=map(gs,0,20,0,127);
  //myservo.write(map(note, 0, 127, 180, 0));
  myservo.write(180-getServoAngle(note));
  }
 }


// plays note.
void noteOn(int cmd, int pitch, int velocity) {
  Serial.write(cmd);
  Serial.write(pitch);
  Serial.write(velocity);
}

void ledControl(int state)
{
  digitalWrite(ledPin, state);
}

// change prog.
void changeProg(int newprog) {
  //This is a program change but not sure how to map to the user banks on the R3
  Serial.write(0xC0);
  Serial.write(newprog);
}

float getSonar() {
  unsigned long pingTime;
float distance;
digitalWrite(trigPin, HIGH); // make trigPin output high level lasting for 10μs to triger HC_SR04,
delayMicroseconds(10);
digitalWrite(trigPin, LOW);
pingTime = pulseIn(echoPin, HIGH, timeOut); // Wait HC-SR04 returning to the high level and measure out this waitting time
distance = (float)pingTime * soundVelocity / 2 / 10000; // calculate the distance according to the time
return distance; // return the distance value
}

String getNote(int code)
{
    int rem = code %12;
    //Serial.println(Notes[rem]);
    return Notes[rem];
}

int getServoAngle(int code)
{
    int rem = code %12;
    //Serial.println(Notes[rem]);
    return rem*(180/12);
Hardware wiring diagram to follow


